Blog ✌️
 --- views
How to create awesome og:images using React components
Published
Flyyer simplifies the process of creating Open Graph image tags for your web or mobile application's share metadata.
One of the most tedious things when writing posts is not writing the post itself, it's finding the right image so that when we share it on social networks it catches the eye and people want to go in and see it; we even use tools like Canva or PhotoShop to make them, or we call our design and marketing team to create this image. ✋ No more.
What if I tell you that you can create images with React components?
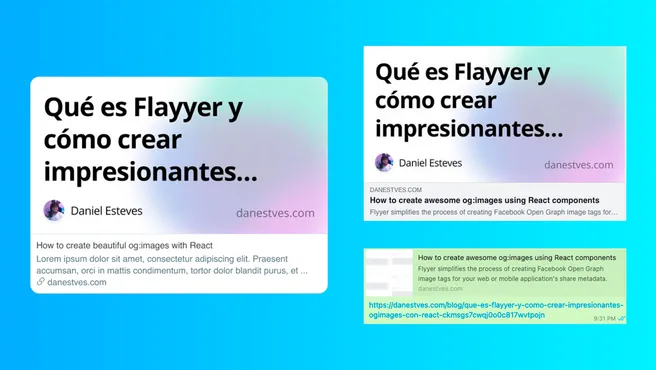
I have already some time testing Flyyer which is a og:image as a service, what this service promises us is to create templates with React or Vue and use them to create images based on them, in these templates we can pass variables with which we can build our images, for example the title and the backgroundImg of a post and we can get the following results:

We can even detect if the userAgent is WhatsApp and generate a specific image for it:
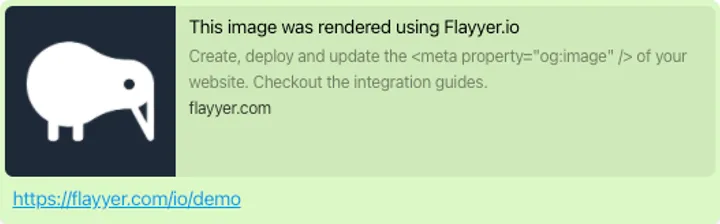
In this case as an example it is just a gray square, but we can put anything in there; thanks to the way Flyyer works we can generate a different view depending on the userAgent, which currently supports a lot of them:
declare enum FlyyerAgentName {
  FACEBOOK = 'facebook',
  MESSENGER = 'messenger',
  WHATSAPP = 'whatsapp',
  INSTAGRAM = 'instagram',
  LINKEDIN = 'linkedin',
  PINTEREST = 'pinterest',
  TELEGRAM = 'telegram',
  TWITTER = 'twitter',
  BING = 'bing',
  REDDIT = 'reddit',
  GOOGLE = 'google',
  GOOGLE_ADS = 'google ads',
  AMAZON_ALEXA = 'amazon alexa',
  AMAZON = 'amazon',
  YANDEX = 'yandex',
  YAHOO = 'yahoo',
  HUBSPOT = 'hubspot',
  MSN = 'msn',
  ZOOM = 'zoom',
  SLACK = 'slack',
  DISCORD = 'discord'
  SAFARI = 'safari',
  FLIPBOARD = 'flipboard',
  APPLE = 'apple',
  DUCKDUCKGO = 'duckduckgo',
  DISQUS = 'disqus',
}
These are the current ones, but little by little they are adding more agents so that we can customize our images even more.
How to start with Flyyer?
First of all I want to tell you that this tutorial will be for React, but if you want to know how to do it with Vue let me know on my Twitter with a DM.
Now let's start by creating a Flyyer app:
yarn create flyyer-app flyyer-tutorial
You will be presented with some options to create the application, for this tutorial we will follow with the react-typescript-tailwind option (if you don`t know TypeScript yet I recommend this post where I teach TS with React), after choosing that option we hit enter and wait for the folder with the application to be created.
Before it is finished, we will need a FLYYER_KEY to be able to deploy our application inside Flyyer, for that, we will create an account in Flyyer, and we will take the key of our account, you can enter here. Keep this key as we will use it later.
When it is finished, we go into the folder and install the dependencies
cd flyyer-tutorial && yarn
After installing the dependencies, we will find this structure of folders and files
flyyer-tutorial/
├── static/
│   ├── background.jpg
│   └── logo.svg
├── templates/
│   └── hello.tsx
├── .eslintrc.js
├── .gitignore
├── flyyer.config.js
├── package.json
├── tsconfig.json
├── types.d.ts
└── README.md
The most important thing is what is inside the templates folder, there we will have our first file called main.tsx.
import React from "react"
import { TemplateProps } from "@flyyer/flyyer-types";
import classNames from "classnames";

import "../styles/tailwind.css";

import background from "../static/background.jpg";
import logo from "../static/logo.svg";

function Layer({ className, ...props}: React.ComponentPropsWithoutRef<"div">) {
  return <div {...props} className={classNames("absolute inset-0", className)} />;
}

// Make sure to 'export default' a React component
export default function MainTemplate({ variables }: TemplateProps) {
  const {
    title = "Hello world!",
    img = background,
    description,
  } = variables;

  return (
    <>
      <Layer>
        <img className="w-full h-full object-cover" src={img} />
      </Layer>
      <Layer className="bg-gradient-to-t from-gray-500 mt-64" />
      <Layer className="flex flex-col justify-end items-start px-12 py-12 text-white">
        <img src={logo} className={classNames("filter-white" /* custom */, "w-36 h-36")} />
        <h1 className="text-6xl mt-4">{title}</h1>
        {description && (
          <h2 className="text-4xl font-mono tracking-wider mt-2">{description}</h2>
        )}
      </Layer>
    </>
  );
}
As you can notice, it does a component like any other React component, but the difference is that we can customize it as we want to create a unique og:image.
It receives as parameters the variables that in this case is what is sent through the URL and that we will use to send any type of data and render it in the component so that at the end it gives us an image.
In this case, the URL of an image would look like this:
?title=Hello&20Word&img=my_image.jpg&description=here%20is%20my%20description
You can notice that it is sent in URL Params format, we don't have to worry because the characters look differently, for example the spaces are transpiled to %20 and Flyyer takes care of parsing this data and deliver it to us in a clean way in the React component.
Now to see our component, we start the development server with
yarn start
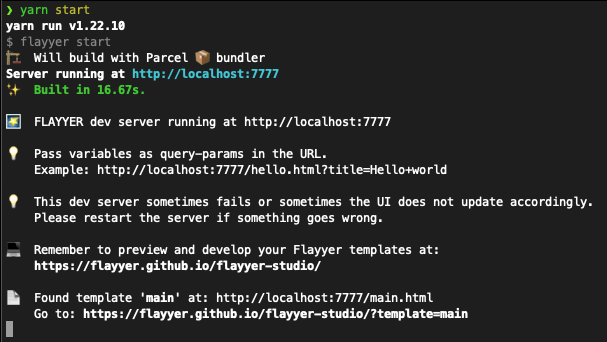
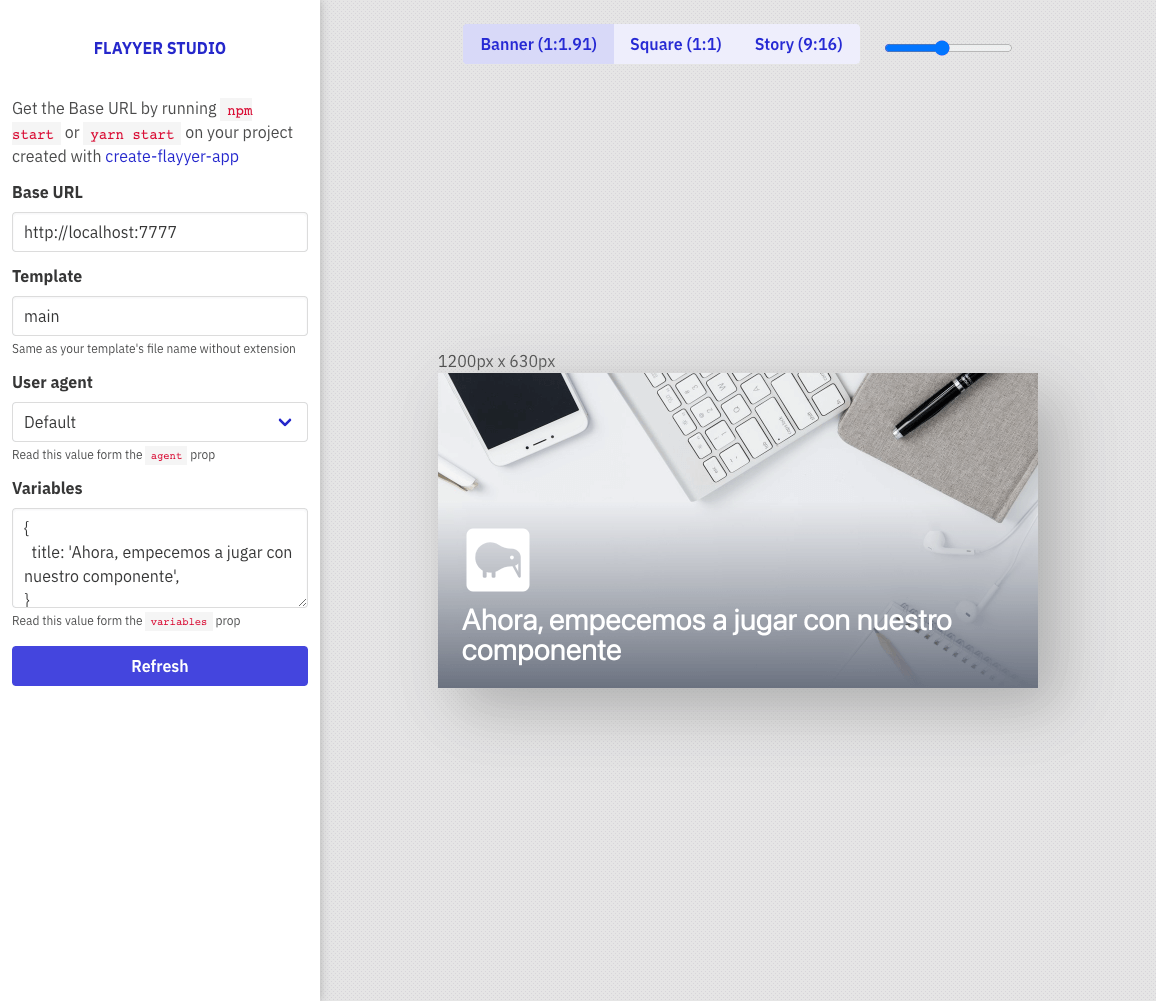
To view our component, go to Flyyer Studio, and we will have the following screen
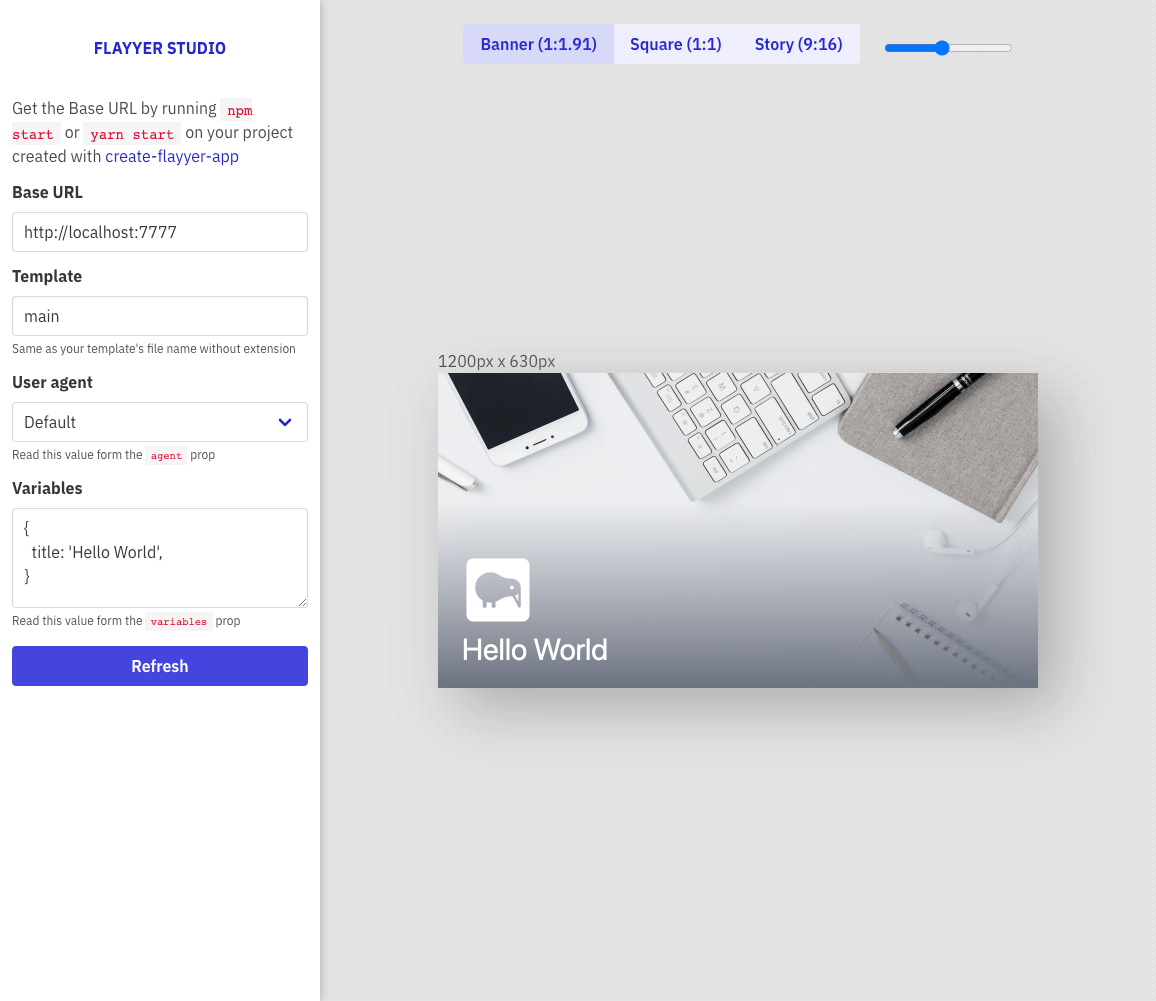
Now this great screen is where we will have automatic refresh every time we change something in the component and where we can pass variables to see how our component acts:
| Campo | Descripción |
|---|---|
| Base URL | The URL of our local server, by default http://localhost:7777. |
| Templates | The name of the template we want to see, these names will be the name of the file inside the templates folder. |
| User agent | We can emulate the agent from where we want to see the image, for now, it has default which is the browser and WhatsApp, but little by little they will be adding more. |
| Variables | And here you can say that this is where the magic happens, is where we will pass all the variables in JSON format and play with them to see how our image acts. |
Now we are going to create a custom component for the WhatsApp view
import React from "react"
// Add FlyyerAgentName to get the enum we will use below
import { TemplateProps, FlyyerAgentName } from "@flyyer/flyyer-types";
import classNames from "classnames";

import "../styles/tailwind.css";

import background from "../static/background.jpg";
import logo from "../static/logo.svg";

function Layer({ className, ...props}: React.ComponentPropsWithoutRef<"div">) {
  return <div {...props} className={classNames("absolute inset-0", className)} />;
}

// Add agent to be able to use this prop as well
export default function MainTemplate({ agent, variables }: TemplateProps) {
  const {
    title = "Hello world!",
    img = background,
    description,
  } = variables;

  // And now we add this conditional to detect if the userAgent is WhatsApp
  if (agent.name === FlyyerAgentName.WHATSAPP) {
    return (
      <Layer className="p-20 bg-white">
        <img
          src={logo}
          alt={title}
          className="w-full h-full"
        />
      </Layer>
    );
  }

  return (
    <>
      <Layer>
        <img className="w-full h-full object-cover" src={img} />
      </Layer>
      <Layer className="bg-gradient-to-t from-gray-500 mt-64" />
      <Layer className="flex flex-col justify-end items-start px-12 py-12 text-white">
        <img src={logo} className={classNames("filter-white" /* custom */, "w-36 h-36")} />
        <h1 className="text-6xl mt-4">{title}</h1>
        {description && (
          <h2 className="text-4xl font-mono tracking-wider mt-2">{description}</h2>
        )}
      </Layer>
    </>
  );
}
With that, now we go to our browser and change the User agent to WhatsApp
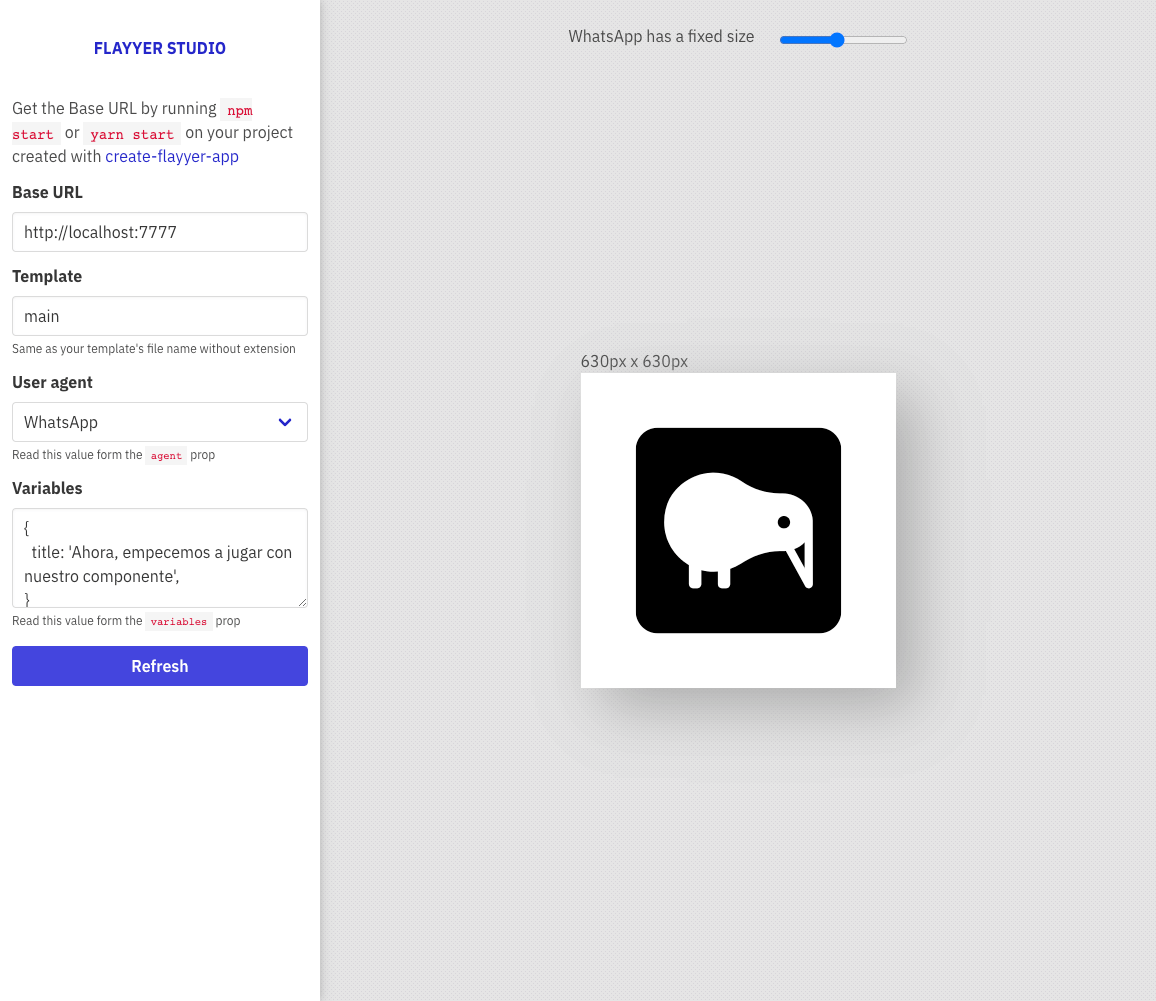
We will see that now we have our view of how the image would look in WhatsApp, and so we can customize as we want the view in WhatsApp and the normal view. Remember that we do not only have WhatsApp, we have a whole list of agents that we can use to customize the images.
Now, from here on, it's up to you to give it your personal touch, change colors, create new code and customize it your way. For reasons of the post on my part, I will leave it that simple, so we can continue with the explanation.
Deploy our component
Well, after we have already customized our component it is time to deploy our app, and this is very simple. Remember Flyyer_KEY that I mentioned above that we would use later? Well, right now, we are going to use it; the first thing we will do is to pause the execution of the Flyyer development server and execute the following commands in the terminal:
# Remember to replace the text after the = with your key
export FlYYER_KEY=wdswermdcl8346egcsre
yarn build && yarn deploy
After it is finished, our template will be up in Flyyer, so it can be used, you will be able to see the properties of your deployment inside your Flyyer account that we previously created.
How can we use our component?
I want to give much more visibility to the documentation, so I will leave you direct links to how to use Flyyer with your favorite technology, the documentation is very well written and besides, you already passed the most complicated part which is the creation of your og:image component:
Want to see an example running?
Inspect this page with the browser console and then go to the <head>, look for a tag called og:image and you will see how it works in production, you can even enter the URL of the image, so you can see it yourself.
In all my website I use NextJS, if you want to see how I implement it I leave you a code extract and the direct link to the file:
const flyyer = new Flyyer({
  tenant: 'danestves',
  deck: 'danestves',
  template: 'blog',
  variables: {
    img: `https://danestves.com${frontMatter.image}`,
    title: frontMatter.seotitle,
    description: frontMatter.summary,
  },
  meta: {
    id: frontMatter.slug,
  },
})
Conclusions
As you can see more and more tools are coming out that make our development much easier every day, now we just call a library, and it does all the work for us. For me, outsource services is one of the best things about programming, I hope this post has been very helpful and if you want me to make a post about how to make the og:image with Vue let me know in a comment on Twitter and I will know how many people are interested in the next post 🚀
- See you at code 👨💻